React 메타버스 웹앱 시리즈입니다.
- 메타버스 앱 - 1. 3D 파일 업로드
- 메타버스 앱 - 2. 배경, 건물 그리고 1인칭 시점
- 메타버스 앱 - 3. 캐릭터
지난 시간에는 메타버스 앱에서 사용할 3D 파일을 업로드하는 기능을 만들었습니다.
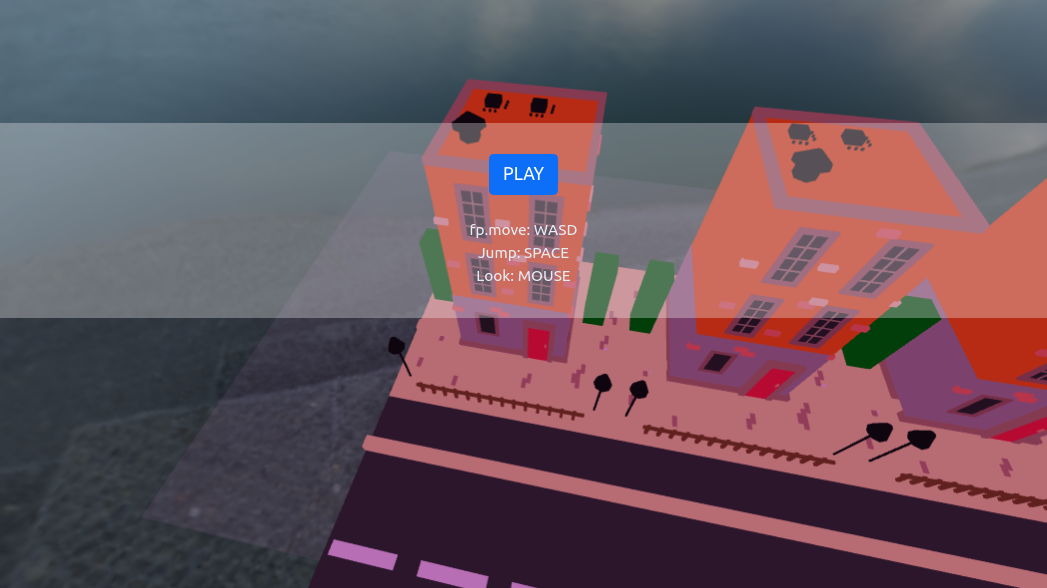
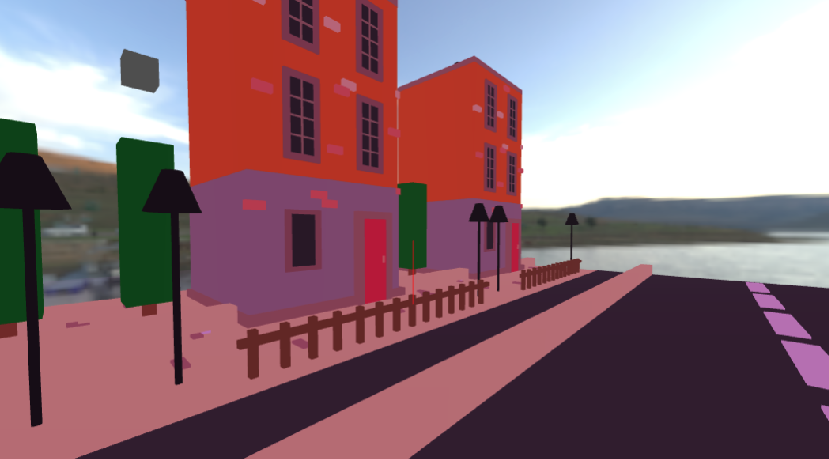
이번 편에서는 업로드된 배경과 건물을 출력하고 1인칭 시점으로 돌아다녀 보겠습니다. 아래 결과처럼 말이죠.
아래와 같이 기능별로 나눈 5개 컴포넌트를 만들어 viewer/ 폴더 안에 넣고 사용해 봅시다.
- Viewer.js: 웹 3D를 구성하는 scene, camera, renderer 및 1인칭 시점 컨트롤러 등 전체 구성을 포괄하는 뷰어 컴포넌트
- Decorator.js: 배경, 빛(조명), 바닥 등 렌더링 환경을 구성하는 컴포넌트
- World.js: 건물이나 지역 등 메타버스의 주 무대가 될 3D 모델을 로딩하는 컴포넌트
- FirstPersonControl.js: 1인칭 시점 컨트롤을 구성하는 컴포넌트
- Landmarker: 마우스를 클릭하여 선택할 수 있는 인터랙션 기능을 가진 개체들을 관리하는 컴포넌트
이외에도 캐릭터나 다른 사용자, 비디오 컨트롤 등 앞으로 많은 컴포넌트들이 늘어나겠지만, 당장은 이것으로 충분하겠네요.
먼저 뷰어를 살펴봅시다.
Viewer
import React, { useEffect, useRef, useState } from 'react';
import { Button, Spinner } from 'reactstrap';
import * as THREE from 'three';
import { OrbitControls } from 'three/examples/jsm/controls/OrbitControls.js';
import { PointerLockControls } from 'three/examples/jsm/controls/PointerLockControls.js';
import Decorator from './Decorator';
import FirstPersonControl from './FirstPersonControl';
import Landmarker from './Landmarker';
import World from './World';

//--- improt 구문에서 보다시피 Viewer는 나머지 4개 컴포넌트를 품고 있습니다.

const Status = {
    INITIALIZING: 'initializing...',
    IDLE: 'idle'
}

//--- 초기화에 시간이 걸리기 때문에 status를 관리합니다.

function Viewer(props) {
    const [status, setStatus] = useState(Status.INITIALIZING);
    const [cg, setCg] = useState(undefined);
    const [delta, setDelta] = useState(0);
    const [userPlaying, setUserPlaying] = useState(false);

    const clock = new THREE.Clock();	//애니메이션에 사용됨

    const canvasRef = useRef(null);		//3D가 그려질 캔버스 공간

    useEffect(() => {
        const init = () => {
            const canvas = props.canvas || canvasRef.current;
            const width = canvas.clientWidth;
            const height = canvas.clientHeight;

            console.log("w:" + width + " h:" + height);

            const scene = new THREE.Scene();
            const camera = new THREE.PerspectiveCamera(75, width / height, 1, 1000);
            //---전형적인 three.js 문법으로 scene과 camera를 생성하고 캔버스 크기에 맞게 설정

            camera.position.set(10, 70, 50);
            camera.rotation.set(Math.PI / 2, Math.PI / 3, Math.PI / 3);
            camera.updateProjectionMatrix();
            //---1인칭 시점 플레이를 위해 카메라 위치를 조정함

            const controls = new PointerLockControls(camera, canvas);
            controls.addEventListener('lock', () => setUserPlaying(true));
            controls.addEventListener('unlock', () => setUserPlaying(false));
            scene.add(controls.getObject());
            //---1인칭 시점 플레이를 위한 PointerLockControls로 이 인스턴스를 FirstPersonControl 컴포넌트에 넘김

            const renderer = new THREE.WebGLRenderer({ antialias: true, preserveDrawingBuffer: true, alpha: true, canvas: canvas });
            renderer.shadowMap.enabled = true;
            renderer.outputEncoding = THREE.sRGBEncoding;
            renderer.setSize(width, height);
            renderer.setPixelRatio(window.devicePixelRatio);
            renderer.setClearColor(0x000000, 0);
            //---렌더러 생성

            const orbit = new OrbitControls(camera, renderer.domElement);
            orbit.enableZoom = true;
            orbit.enabled = true;
            //---화면 컨트롤 가능하게 함

            setCg({ canvas: canvas, scene: scene, camera: camera, renderer: renderer, controls: controls });
            //---cg 스테이트에 scene, camera, renderer 등 필요한 것들을 업데이트함
            //---별개로 다룰 경우 우선순위 문제 때문에 복잡해지길래 cg(computer graphics의 약자)로 묶었습니다.
        }

        init();
    }, []);
    //---여기까지, 최초 1회 init()이 호출되면서 scene, camera, renderer를 구성합니다.

    useEffect(() => {
        if (!cg) {
            return;
        }

        const animate = () => {
            setDelta(clock.getDelta());
            cg.renderer.render(cg.scene, cg.camera);
            requestAnimationFrame(animate);
        }

        animate();
    }, [cg]);
    //---cg 설정이 완료되면, 즉 무대가 생성되면 animate를 시작합니다.
    //---이때, animate 안에서는 delta 값만 state에 업데이트해줍니다.
    //---이렇게 하면 애니메이션에 관련된 나머지 동작은 delta 값을 바라보는 하위 컴포넌트들이 각자 알아서 하겠죠.

    const enterFirstPerson = () => {
        cg.scene.fog = new THREE.Fog(0xffffff, 0, 750);
        cg.controls.lock();
    }
    //---PLAY 버튼을 누르면 1인칭 시점으로 플레이합니다.

    return (<>
        {props.canvas || <canvas ref={canvasRef} style={{ width: '100%', height: '100%', border: '1px dashed gray' }} />}

        {status === Status.INITIALIZING &&
            <div style={{ position: 'absolute', width: '100%', height: '100%', zIndex: 9, textAlign: "center", backgroundColor: 'rgba(255,255,255,0.8)' }}>
                <Spinner style={{ width: '3rem', height: '3rem', marginTop: '30%' }} />
            </div>
        }

        {cg &&
            <>
                <World
                    world={props.world}
                    scene={cg.scene}
                    onLoad={() => setStatus(Status.IDLE)} />
                <Decorator
                    hdri={props.hdri}
                    scene={cg.scene}
                    renderer={cg.renderer}
                />
                <Landmarker
                    scene={cg.scene}
                />
                <FirstPersonControl
                    scene={cg.scene}
                    controls={cg.controls}
                    camera={cg.camera}
                    delta={delta}
                />
            </>
        }
        {userPlaying ||
            <div style={{ position: 'absolute', zIndex: 1, top: '20%', width: '100%' }}>
                <div style={{ width: '100%', height: '100%', display: 'box', textAlign: 'center', background: 'rgba(255,255,255,0.3)', padding: '2em', color: '#e6ecf5', fontSize: '14px' }}>
                    <Button onClick={enterFirstPerson} color="primary">PLAY</Button>
                    <br /><br />fp.move: WASD<br />Jump: SPACE<br />Look: MOUSE
                </div>
            </div>
        }

    </>)
}

export default Viewer;
뷰어는 three.js 전형적인 자바스크립트 코드와 구성이 비슷합니다. animate()의 delta 값만 업데이트하면서 관련 작업들은 하위 컴포넌트에게 넘겨, 코드를 간결히 만들었어요.
Decorator
이제 빛과 배경, 바닥을 그려봅시다.
import React, { useEffect } from 'react';
import * as THREE from 'three';
import { RGBELoader } from 'three/examples/jsm/loaders/RGBELoader';

const BASE_URL_HDRI = window.location.protocol + '//' + window.location.hostname + ':' + window.location.port + '/hdri/';

function Decorator(props) {
    useEffect(() => {
        const setLight = ({ scene }) => {
            scene.add(new THREE.AmbientLight(0xff52ff, 0.6));
        }
        //---전체적으로 잘 보이게 이상적인 AmbientLight를 넣습니다.

        const setBackground = (props) => {
            if (props.hdri) {
                const filepath = BASE_URL_HDRI + props.hdri;
                console.log('setBackground: loading... ' + filepath);
                new RGBELoader()
                    .setDataType(THREE.UnsignedByteType)
                    .setPath(BASE_URL_HDRI)
                    .load('small_harbor_01_1k.hdr', (texture) => {
                        const pmremGenerator = new THREE.PMREMGenerator(props.renderer);
                        const envMap = pmremGenerator.fromEquirectangular(texture).texture;
                        pmremGenerator.compileEquirectangularShader();

                        props.scene.background = envMap;
                        props.scene.environment = envMap;

                        texture.dispose();
                        pmremGenerator.dispose();
                    })
                    //---지난 편에서 업로드한 HDR 파일을 배경으로 로딩하는 과정은 설명이 복잡해서 그냥 따라하는 것이 좋습니다.
                    //---다만, three.js 버전별로 코드가 안 먹는 경우가 있으니 버전에 유의하도록 합니다.
            } else {
                props.scene.background = new THREE.Color().setHSL(0.6, 0, 1);
                props.scene.fog = new THREE.Fog(props.scene.background, 500, 10000);
            }
        }

        const setGround = (props) => {
            let floorGeometry = new THREE.PlaneGeometry(100, 100, 10, 10);
            let floorMaterial= new THREE.MeshPhongMaterial({
    	        color: 0xffffff, opacity: 0.1, transparent: true
            });

            let floor = new THREE.Mesh(floorGeometry, floorMaterial);
            floor.rotation.x = -0.5 * Math.PI;
            floor.receiveShadow = true;
            props.scene.add(floor);
        }
        //---바닥을 그려줍니다.


        setLight(props);
        setBackground(props);
        setGround(props);
    }, []);

    return (<></>);
}

export default Decorator;
빛은 제대로 다루려면 어렵습니다. 당장은 AmbientLight로 보이게만 합니다. 로블록스 느낌이 나네요.
World
주요 무대인 건물을 그려봅시다. 받아둔 3D 건물 FBX 파일을 로딩해서 스케일을 조정하는 간단한 코드입니다.
import React, { useEffect } from 'react';
import * as THREE from 'three';
import { FBXLoader } from 'three/examples/jsm/loaders/FBXLoader';
import { GLTFLoader } from 'three/examples/jsm/loaders/GLTFLoader';
import { TGALoader } from 'three/examples/jsm/loaders/TGALoader';

const BASE_URL = window.location.protocol + '//' + window.location.hostname + ':' + window.location.port + '/world/';

function World(props) {
    useEffect(() => {
        const loadModel = (fullpath) => {
            console.log("load world: ", fullpath);
            let manager = new THREE.LoadingManager();
            manager.addHandler(/\.tga$/i, new TGALoader());

            let isFBX = (fullpath.includes('fbx') || fullpath.includes('FBX'));
            let loader = isFBX ? new FBXLoader(manager) : new GLTFLoader();
            return new Promise((resolve, reject) =>
                loader.load(fullpath, (loaded) => {
                    let model = loaded.scene ? loaded.scene : loaded;
                    model.traverse(parseRig);
                    postprocess({ model: model, offsetScale: 0.01 });
                    resolve(model);
                })
            );
        }

        async function init() {
            const model = await loadModel(BASE_URL + props.world);
            props.scene.add(model);
            props.onLoad && props.onLoad('loaded');
        }

        init();
    }, []);

    const parseRig = (obj) => {
        try {
            obj.frustumCulled = false;

            if (obj.type.indexOf('ight') > 0) {
                console.log("Remove included lights: " + obj.name);
                obj.intensity = 0
            }
            //---간혹 3D 모델 안에 빛(광원; light)이 있을 경우 지나치게 밝아지거나 하므로 제거해줍니다.

            if (obj.isMesh) {
                obj.castShadow = true;
                obj.receiveShadow = true;

                if (obj.material.map) {
                    obj.material.map.anisotropy = 8;
                }
            }
        } catch (e) { }
    }

    const postprocess = ({ model, offsetPosition, offsetRotation, offsetScale }) => {
        if (offsetPosition) {
            model.position.x += offsetPosition.x;
            model.position.y += offsetPosition.y;
            model.position.z += offsetPosition.z;
        }

        if (offsetRotation) {
            model.rotation.x += offsetRotation.x;
            model.rotation.y += offsetRotation.y;
            model.rotation.z += offsetRotation.z;
        }

        if (offsetScale) {
            model.scale.set(offsetScale, offsetScale, offsetScale);
        }
    }

    return (<>
    </>);
}

export default World;
1인칭 시점 플레이
1인칭 시점으로 플레이해봅시다. 이 코드는 아래 링크를 참고했습니다.
import React, { useEffect } from 'react';
import * as THREE from 'three';

const fp = {
    moveForward: false,
    moveBackward: false,
    moveLeft: false,
    moveRight: false,
    canJump: false,
    velocity: new THREE.Vector3(),
    direction: new THREE.Vector3(),
    objects: [],
    intersectedObject: undefined,
    arrowHelper: undefined
}
//---1인칭 플레이에서 사용할 변수들

function FirstPersonControl(props) {
    const raycaster = new THREE.Raycaster();
    //---앞에 뭐가 있는지 가리키는 용도(총이라면 과녁 같은 것으로 생각하면 되겠죠.)

    useEffect(() => {
        const createKeyInput = () => {
            document.addEventListener('keydown', (event) => {
                switch (event.code) {
                    case 'ArrowUp':
                    case 'KeyW':
                        fp.moveForward = true;
                        break;
                    case 'ArrowLeft':
                    case 'KeyA':
                        fp.moveLeft = true;
                        break;
                    case 'ArrowDown':
                    case 'KeyS':
                        fp.moveBackward = true;
                        break;
                    case 'ArrowRight':
                    case 'KeyD':
                        fp.moveRight = true;
                        break;
                    case 'Space':
                        if (fp.canJump === true) {
                            fp.velocity.y += 150;
                        }
                        fp.canJump = false;
                        break;
                    default:
                        break;
                }
            });

            document.addEventListener('keyup', (event) => {
                switch (event.code) {
                    case 'ArrowUp':
                    case 'KeyW':
                        fp.moveForward = false;
                        break;

                    case 'ArrowLeft':
                    case 'KeyA':
                        fp.moveLeft = false;
                        break;

                    case 'ArrowDown':
                    case 'KeyS':
                        fp.moveBackward = false;
                        break;

                    case 'ArrowRight':
                    case 'KeyD':
                        fp.moveRight = false;
                        break;
                    default:
                        break;
                }
            })

            document.addEventListener('mousedown', () => {
                processRaycaster();
            });
        }

        createKeyInput();
        //---키보드로 플레이할 수 있도록 합니다.
    }, []);


    useEffect(() => {
        if (props.controls.isLocked === true) {
            drawRaycaster();

            fp.velocity.x -= fp.velocity.x * 10.0 * props.delta;
            fp.velocity.z -= fp.velocity.z * 10.0 * props.delta;

            fp.velocity.y -= 9.8 * 100.0 * props.delta; // 100.0 = mass

            fp.direction.z = Number(fp.moveForward) - Number(fp.moveBackward);
            fp.direction.x = Number(fp.moveRight) - Number(fp.moveLeft);
            fp.direction.normalize(); // this ensures consistent fp.movements in all fp.directions

            if (fp.moveForward || fp.moveBackward) fp.velocity.z -= fp.direction.z * 400.0 * props.delta;
            if (fp.moveLeft || fp.moveRight) fp.velocity.x -= fp.direction.x * 400.0 * props.delta;

            props.controls.moveRight(- fp.velocity.x * props.delta);
            props.controls.moveForward(- fp.velocity.z * props.delta);

            props.controls.getObject().position.y += (fp.velocity.y * props.delta); // new behavior

            if (props.controls.getObject().position.y < 10) {
                fp.velocity.y = 0;
                props.controls.getObject().position.y = 10;
                fp.canJump = true;
            }
        }

    }, [props.delta]);

    const processRaycaster = () => {
        const intersects = raycaster.intersectObjects(fp.objects);
        if (intersects.length > 0) {
            if (fp.intersectedObject) {
                fp.intersectedObject.material.color.setHex(0xffffff);
            }
            intersects[0].object.material.color.setHex(0xfff000);
            intersects[0].object.material.opacity = 1;
            fp.intersectedObject = intersects[0].object;

            if (props.onSelect) {
                props.controls.unlock();
                if (fp.intersectedObject) {
                    fp.intersectedObject.material.color.setHex(0xffffff);
                }
                fp.intersectedObject = undefined;
                raycaster.set(new THREE.Vector3(0, 0, 0), new THREE.Vector3(0, 0, 0));
                props.onSelect(intersects[0].object.userData);
            }
        } else {
            if (fp.intersectedObject) {
                fp.intersectedObject.material.color.setHex(0xffffff);
            }
            fp.intersectedObject = undefined;
        }
    }

    const drawRaycaster = () => {
        raycaster.set(props.camera.getWorldPosition(new THREE.Vector3()), props.camera.getWorldDirection(new THREE.Vector3()));
        props.scene.remove(fp.arrowHelper);

        let o = raycaster.ray.origin;
        o.y -= 0.2;

        fp.arrowHelper = new THREE.ArrowHelper(raycaster.ray.direction, o, 300, 0xff0000);
        props.scene.add(fp.arrowHelper);
    }

    return (<>
    </>)
}

export default FirstPersonControl;
1인칭 시점 코드는 언뜻 복잡해 보이지만, 실제로는 three.js 라이브러리에서 많은 부분을 처리해주고 있기 때문에 다루기 쉽습니다.
특히 중간에 processRaycaster() 부분은 내 앞에 놓인(rayCaster가 향하는) 오브젝트를 마우스 클릭으로 선택할 수 있는데, 이때 콜백(onSelect)을 통해 해당 오브젝트에 포함된 유저 데이터를 참고해서 링크를 열거나 추가 액션을 수행할 수 있습니다. 이는 Landmarker.js와 관련이 있는데, 다음 편에서 자세히 다루도록 하겠습니다.
'IT > 3D Web' 카테고리의 다른 글
| [3D Web] Character Creator 3 to Three.js (0) | 2021.08.05 |
|---|---|
| 메타버스 앱 - 3. 캐릭터 (0) | 2021.07.10 |
| 메타버스 앱 - 1. 3D 파일 업로드 (2) | 2021.07.01 |
| Google TTS (0) | 2021.05.27 |
| React 3D 웹앱 - 4. 3D 뷰어 (0) | 2021.04.24 |