간단한 REST API를 만들어 봅시다. 순서는 다음과 같습니다.
- React 클라이언트에서 사진을 찍어 Node.js 서버로 보냅니다. (RESTful API)
- Node.js 서버(express)는 Python 앱을 실행합니다.
- Python 앱은 받은 이미지로 뭔가를 했다고 치고 결과를 리턴합니다.
- Node.js 서버는 클라이언트에게 결과를 보냅니다.
- React 클라이언트는 받은 결과를 표시합니다.
Client App
먼저 클라이언트를 만듭시다.
- client$ npx create-react-app client
- client$ npm install --save axios @rubenchoi/webcam
코드는 간단합니다.
import { WebcamComponent } from '@rubenchoi/webcam';
import axios from 'axios';
import './App.css';
import React from 'react';

const BASE_URL = window.location.protocol + '//' + window.location.hostname + ':4000';

function App() {
  const [url,] = React.useState(BASE_URL);
  const [response, setResponse] = React.useState();
  const [sent, setSent] = React.useState();

  const onImage = (imageUrl) => {
    console.log("onImage:", imageUrl);
    axios.post(BASE_URL + "/image",
      JSON.stringify({ imageUrl: imageUrl }),
      { headers: { 'Content-Type': 'application/json' } })
      .then(res => setResponse(JSON.stringify(res.data.boundary)))
      .catch(error => setResponse('' + error))
    setSent(Date.now());
  }

  return (
    <div className="App">
      <WebcamComponent
        onImage={onImage}
        showDetail
      />
      <div style={{ clear: 'both' }}>
        <hr style={{ height: '2em' }} />
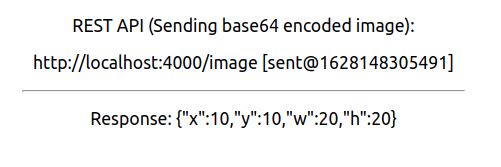
        <p>REST API (Sending base64 encoded image): </p>
        <p>{url + '/image'} [sent@{sent}]</p>
        <p></p>
        <hr style={{ width: '25em' }} />
        <p>Response: {response}</p>
      </div>
    </div>
  );
}

export default App;
사진을 찍어 base64로 인코딩된 문자열을 Node.js 서버로 보냅니다. 로컬에서 서버를 돌리기 때문에 BASE_URL을 로컬로 했는데요, 나중에 서버를 옮기면 이 BASE_URL만 바꿔주면 되겠죠. 실행해 보면, 아직 서버를 만들지 않아서 404 에러가 납니다.

Server App
Node.js Express로 서버를 만듭니다.
- server$ npm init
- server$ npm install --save cors express nodemon pyhton-shell
import { PythonShell } from 'python-shell';
import express from 'express';
import cors from 'cors';

const PORT = 4000;

const app = express();

app.use(express.urlencoded({ extended: false }));
app.use(express.static('public'));
app.use(cors());
app.use(express.json());

app.post('/image', (req, res) => {
    console.log("POST/image requested. Received data length=", req.body.imageUrl.length);

    let data;
    const pyshell = new PythonShell('./test.py');
    pyshell.send(req.body.imageUrl);
    pyshell.on('message', (message) => data = message);
    pyshell.end((err, code, signal) => res.status(err ? 500 : 200).send(data));

})

app.listen(PORT, () => {
    console.log("Server is running at port " + PORT);
})
Client에서 BASE_URL에서 사용할 서버 포트 4000을 열어주고 python-shell을 이용해서 파이썬 코드를 실행하고 응답을 받습니다. Python 예제 앱은 다음과 같습니다.
import sys, json

for line in sys.stdin:
    obj = {
        "imageUrl": line,
        "boundary": {
            "x": 10,
            "y": 10,
            "w": 20,
            "h": 20
        }
    }
    print(json.dumps(obj))
파이썬 앱이 계속 살아있는 상태에서 데이터를 주고 받으려면 threading을 사용해도 되지만, 사실 그런 구조라면 Node.js에서 파이썬을 실행시키는 것보다 파이썬이 독자적으로 실행된 상태에서 Websocket 같은 것으로 데이터를 주고 받는 것이 옳습니다.

728x90
반응형
'IT > Programming' 카테고리의 다른 글
| Embedded Python Application (0) | 2022.12.31 |
|---|---|
| [Book Review] (0) | 2021.10.03 |
| UX 디자인 패턴 (0) | 2021.08.04 |
| React 라이브러리 npm 배포 (0) | 2021.04.12 |
| 웹 프로그래밍 - HTML 템플릿 (0) | 2021.03.15 |