ROS는 로봇을 컨트롤하는 기술입니다. OS라기보다는 (MQTT처럼) publish-subscribe 구조로 명령과 상태를 주고 받는 메시지 브로커에 가깝죠.
꼭 로봇이 없어도 시뮬레이터를 사용해 ROS를 해볼 수 있는데요, 오늘은 인천공항 로봇으로 널리 알려진 LG CLOi 로봇 시뮬레이터를 통해 작업해 보겠습니다.
ROS2 설치 및 실행
ROS는 ROS1과 ROS2 두 개 버전이 있는데요, ROS1에 비해 ROS2는 설치부터 아주 간단합니다. ROS1 설치하려면 준비과정도 복잡하고 오류도 많이 나는 데다가 설치 후에도 설정해 줄 것들이 많아요. 따라서 우리는 ROS2를 사용하겠습니다. 윈도우나 맥에서도 ROS2를 깔 수 있지만, 여기서는 리눅스(Ubuntu 18.04 LTS)를 기준으로 합니다.
Installing ROS 2 on Ubuntu Linux — ROS 2 Documentation: Foxy documentation
This page explains how to install ROS 2 on Ubuntu Linux from a pre-built binary package. You will need to add the ROS 2 apt repositories to your system. To do so, first authorize our GPG key with apt like this: sudo apt update && sudo apt install curl gnup
docs.ros.org
ROS2에도 여러 버전이 있는데, Foxy가 최신 버전이지만 Ubuntu 20.에서 돌아갑니다. Ubuntu 18.04에서는 Dashing을 많이들 쓰시는 것 같은데, 저는 Eloquent를 설치해서 쓰고 있어요.
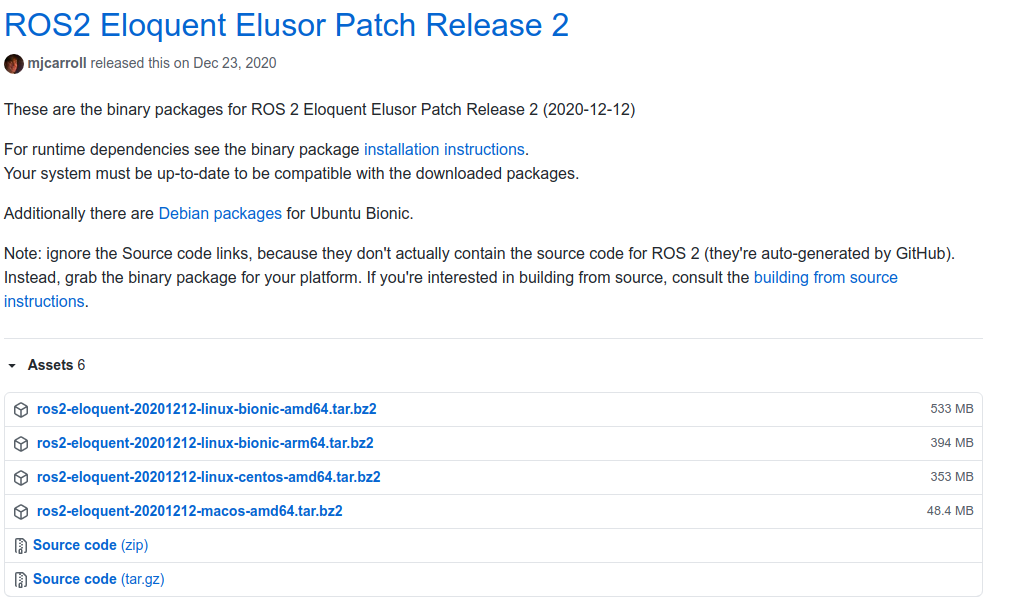
설치 방법은 그대로 따라하면 됩니다. 단, 패키지를 다운로드 할 때 버전이 몇 개 있는데요, amd64, arm64인지 잘 모르겠으면, dpkg 명령을 쳐서 자신의 시스템을 확인 후 해당 버전을 다운 받아 설치합니다.
$dpkg -s libc6 | grep Arch
   Architecture: amd64
   Multi-Arch: same
LG CLOi 시뮬레이터
ROS2 설치가 끝났으면 LG CLOi 시뮬레이터를 설치합니다. 시뮬레이터와 ros2 패키지를 설치해야 하는데요, 우선 시뮬레이터부터 설치해봅시다.
lge-ros2/cloisim
Unity3D based multi-robot simulator can bring-up simulation environment by SDF(Simulation Description File) easily. And it supports to connect ROS2 through cloisim_ros. - lge-ros2/cloisim
github.com
사이트에 안내된 대로 CLOiSim-2.3.1.tar.xz를 다운 받아 설치합니다.이후 Usage 항목에서 소개한 리소스를 다운 받아 설치 후 export 세팅을 합니다. 저는 리소스를 시뮬레이터가 설치된 디렉토리에 다운 받고 export 항목들을 run.sh 상단에 상대경로로 추가했어요.
#!/bin/bash
targetWorld=$1

export CLOISIM_FILES_PATH="./sample_resources/media"
export CLOISIM_MODEL_PATH="./sample_resources/models"
export CLOISIM_WORLD_PATH="./sample_resources/worlds"

ShowEnvironmentHelp()
{
  echo ""
  echo "Please set environment path before run the simulation."
이제 $./run.sh lg_seocho.world 를 실행하면,
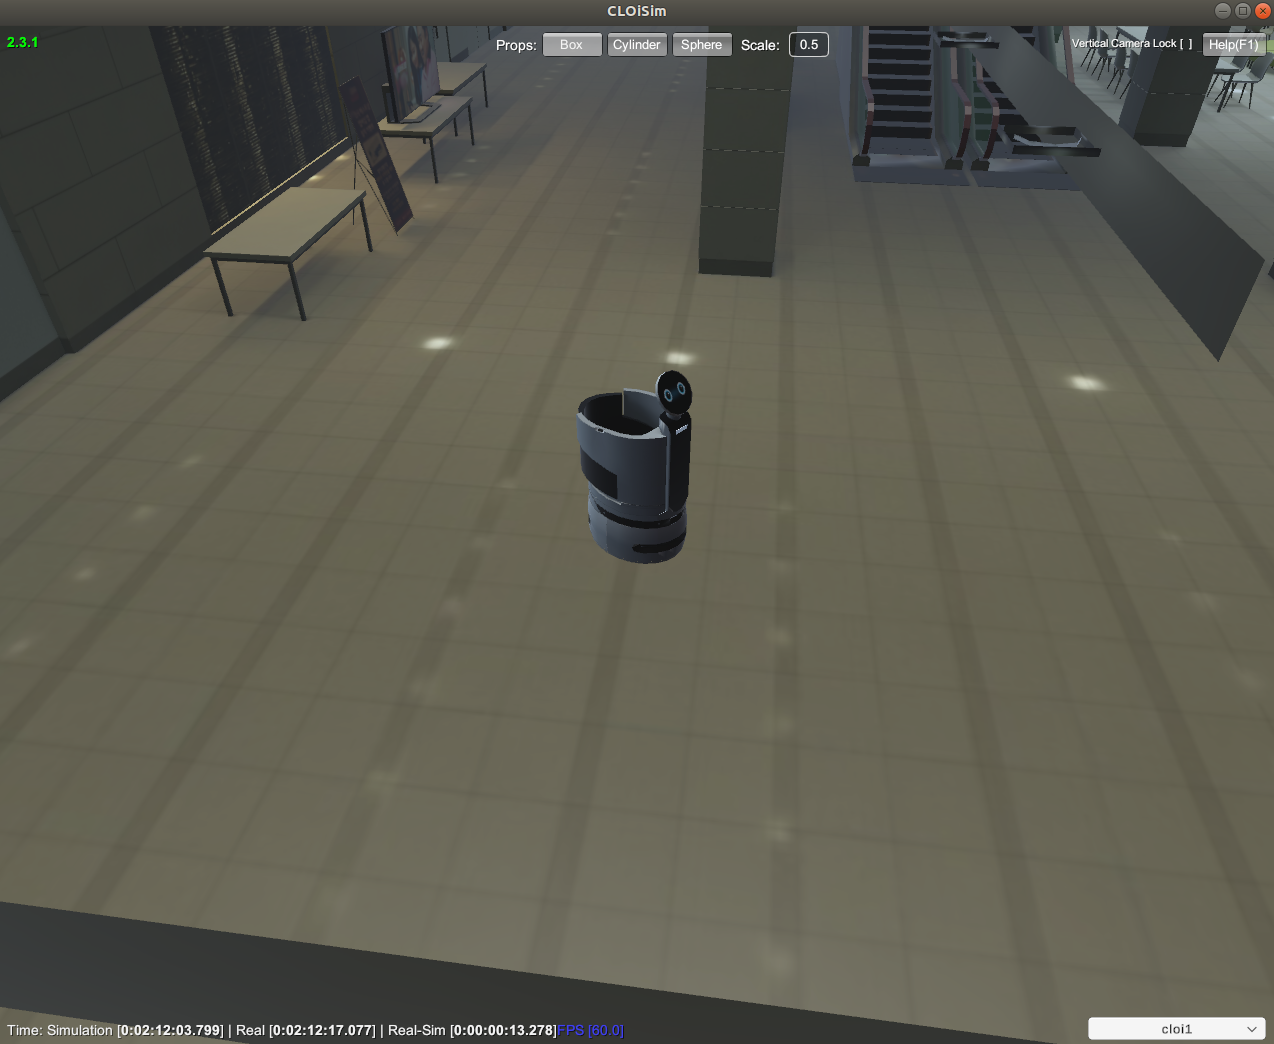
와우~ 훌륭하네요!
CLOISIM_ROS
이제 CLOi를 움직여 봅시다.
lge-ros2/cloisim
Unity3D based multi-robot simulator can bring-up simulation environment by SDF(Simulation Description File) easily. And it supports to connect ROS2 through cloisim_ros. - lge-ros2/cloisim
github.com
Ubuntu 18.04 기준이므로 Foxy 버전을 사용하는 대신 도커를 사용합니다. 중간에 Using Docker 부분을 따라서 도커 이미지를 다운 받아 빌드합니다. 그리고 실행하는데, 이때 주의할 점은 시뮬레이터가 실행된 상태에서 실행해야 오류 없이 실행됩니다.
$ sudo docker run -it --rm --net=host cloisim_ros
[sudo] password for ruben:
Check ROS_DOMAIN_ID here!!
ROS_DOMAIN_ID=
[INFO] [launch]: All log files can be found below /root/.ros/log/2021-05-26-02-05-16-410468-cloi-restaurant-1
[INFO] [launch]: Default logging verbosity is set to INFO
[INFO] [cloisim_ros_bringup-1]: process started with pid [33]
[cloisim_ros_bringup-1] [INFO] [1621994716.702473233] [cloisim_ros_bringup_param]: single mode: 0 target model:  target_parts_type:  target_parts_name:
[cloisim_ros_bringup-1] [2021-05-26 02:05:16] [connect] Successful connection
[cloisim_ros_bringup-1] [2021-05-26 02:05:16] [connect] WebSocket Connection 127.0.0.1:8080 v-2 "WebSocket++/0.8.1" /control 101
[cloisim_ros_bringup-1] Item Name(Target Model): SeochoTower
[cloisim_ros_bringup-1] 	Node Type(Target Parts Type): ELEVATOR
[cloisim_ros_bringup-1] 		Node Name(Target Parts Name): elevator_system
[cloisim_ros_bringup-1] [Initialize][52] hash Key srv: SeochoTowerelevator_system
[cloisim_ros_bringup-1] [ConnectClient][379] address(tcp://127.0.0.1:49153)
[cloisim_ros_bringup-1] Item Name(Target Model): World
[cloisim_ros_bringup-1] 	Node Type(Target Parts Type): WORLD
[cloisim_ros_bringup-1] 		Node Name(Target Parts Name): cloisim_world
[cloisim_ros_bringup-1] [Initialize][50] hash Key sub: Worldcloisim_world
[cloisim_ros_bringup-1] [ConnectSubscriber][331] address(tcp://127.0.0.1:49152)
[cloisim_ros_bringup-1] Item Name(Target Model): cloi1
[cloisim_ros_bringup-1] 	Node Type(Target Parts Type): CAMERA
[cloisim_ros_bringup-1] 		Node Name(Target Parts Name): camera
[cloisim_ros_bringup-1] [Initialize][52] hash Key sub: cloi1camera
[cloisim_ros_bringup-1] [ConnectSubscriber][331] address(tcp://127.0.0.1:49155)
[cloisim_ros_bringup-1] [ConnectClient][379] address(tcp://127.0.0.1:49154)
[cloisim_ros_bringup-1] [GetRos2Parameter][243] topic_name: color, frame_id: base_link
[cloisim_ros_bringup-1] 	Node Type(Target Parts Type): GPS
[cloisim_ros_bringup-1] 		Node Name(Target Parts Name): gps
[cloisim_ros_bringup-1] [Initialize][48] hash Key sub: cloi1gps
[cloisim_ros_bringup-1] [ConnectSubscriber][331] address(tcp://127.0.0.1:49159)
[cloisim_ros_bringup-1] [ConnectClient][379] address(tcp://127.0.0.1:49158)
[cloisim_ros_bringup-1] [GetRos2Parameter][243] topic_name: navsatfix, frame_id: gps
[cloisim_ros_bringup-1] 	Node Type(Target Parts Type): LASER
[cloisim_ros_bringup-1] 		Node Name(Target Parts Name): lidar
[cloisim_ros_bringup-1] [Initialize][53] hash Key sub: cloi1lidar
[cloisim_ros_bringup-1] [ConnectSubscriber][331] address(tcp://127.0.0.1:49157)
[cloisim_ros_bringup-1] [ConnectClient][379] address(tcp://127.0.0.1:49156)
[cloisim_ros_bringup-1] [GetRos2Parameter][243] topic_name: scan, frame_id: base_scan
[cloisim_ros_bringup-1] [GetOutputType][130] output_type: LaserScan
[cloisim_ros_bringup-1] 	Node Type(Target Parts Type): MICOM
[cloisim_ros_bringup-1] 		Node Name(Target Parts Name): RobotControl
[cloisim_ros_bringup-1] [Initialize][62] Hash Key sub(cloi1RobotControlTx) pub(cloi1RobotControlRx)
[cloisim_ros_bringup-1] [ConnectSubscriber][331] address(tcp://127.0.0.1:49161)
[cloisim_ros_bringup-1] [ConnectPublisher][347] address(tcp://127.0.0.1:49162)
[cloisim_ros_bringup-1] [ConnectClient][379] address(tcp://127.0.0.1:49160)
[cloisim_ros_bringup-1] [GetWeelInfo][166] wheel.tread:0.449000 m
[cloisim_ros_bringup-1] [GetWeelInfo][167] wheel.radius:0.095500 m
[cloisim_ros_bringup-1] [GetTransformNameInfo][221] transform name imu:imu, wheels(0/1):wheel_left/wheel_right
이제 시뮬레이터는 ROS 명령을 받을 준비가 되었습니다.
CLI 컨트롤러
커맨드 라인에서 CLOi를 컨트롤해 봅시다.
먼저 터미널에서 ROS 환경을 적용해야 하는데요, ROS를 쓸 때마다 부르는 명령이기 때문에 저는 아예 ~/.bashrc 에 아래와 같이 alias를 추가해서 사용합니다.
alias goros='source /opt/ros/eloquent/setup.bash'경로는 ROS2가 설치된 경로입니다. 사람마다 다를 수 있겠죠.
터미널에서 저 명령(goros)을 한 번 호출하고 나서 teleop_twist_keyboard 사용 명령을 내려 보면,
$ ros2 run teleop_twist_keyboard teleop_twist_keyboard __ns:=/cloi1
[WARN] [rcl]: Found remap rule '__ns:=/cloi1'. This syntax is deprecated. Use '--ros-args --remap __ns:=/cloi1' instead.

This node takes keypresses from the keyboard and publishes them
as Twist messages. It works best with a US keyboard layout.
---------------------------
Moving around:
   u    i    o
   j    k    l
   m    ,    .

For Holonomic mode (strafing), hold down the shift key:
---------------------------
   U    I    O
   J    K    L
   M    <    >

t : up (+z)
b : down (-z)

anything else : stop

q/z : increase/decrease max speeds by 10%
w/x : increase/decrease only linear speed by 10%
e/c : increase/decrease only angular speed by 10%

CTRL-C to quit

currently:	speed 0.5	turn 1.0
터미널에 대고 J, I 키보드를 눌러보면 클로이가 움직입니다!
이렇게 간단하게 로봇, 클로이를 다뤄볼 수 있다니, 대단하군요! 역시, 로봇 기술을 선도하는 기업답네요.
다음 편에서는 커맨드 라인 대신 GUI가 있는 웹앱으로 클로이를 움직여 보겠습니다.
Tip.
오늘처럼 여러 터미널 창을 띄어야 하는 경우에는 관리하기가 쉽지 않은데요, 이때 terminator를 사용하면 아주 편리합니다.
sudo apt install terminator설치 후 실행된 창에서 Shift+Ctrl+O(수평 분할) Shift+Ctrl+E(수직 분할)로 창을 나눠서 사용할 수 있습니다. 단, 매번 새로 분할된 창에는 ~/.bashrc 설정만 적용됩니다. 현재 디렉토리에서 시작하는 것 빼고는 처음 터미널을 실행한 상태와 같다고 보면 됩니다.
'IT > Network & OS' 카테고리의 다른 글
| ROS - 3. React 웹앱 (0) | 2021.05.27 |
|---|---|
| ROS - 2. ROS2 Web Server & 웹앱 (0) | 2021.05.17 |
| 네트워크 - 2. MQTT Client (0) | 2021.04.08 |
| 네트워크 - 1. MQTT (0) | 2021.04.02 |
| Art Deco Fonts - 무료 폰트 (0) | 2021.03.11 |